Halloween Crafts – Mad Man’s Laboratory

Your parents will have to help you with this project. Even though this project is easy once you get going, it requires the use of tools to complete (hammer and nails).


What You Need:


  • Old car or electronic parts
  • Clear tubes
  • Old wires
  • Old board
  • Hammer and nails
  • Clear plastic jars or containers
  • Fake hand
  • Paint
  • Plastic skull, bugs, snakes, rats or whatever you like
  • Water
  • Red food coloring
  • Old fish aquarium pump
  • Old jars of baby food (or small containers)
  • Garlic powder, tobascco sauce, green ketchup, grated Parmesan cheese, cold spaghetti, anything else smelly or gross looking.
  • Colored Christmas lights (red and green are great)

What To Do:


  1. Take old car parts, wires, and tubes and nailed them in creative ways to a board. Leave a big enough space in the middle to place a fake hand.
  2. In the middle place a fake plastic hand. Stick some of the wires and tubes into the hand. You can even paint the inside of clear plastic tubes different colors (green is always good). Fake blood dripping down is a great effect!
  3. Take an old clear plastic container or jar. Place a fake plastic skull inside the container. Add bugs, snakes, rats, toads or anything else you can think of inside. Add water until the container is about three quarters full. Put in a drop or two of red food coloring. All you want here is a pink color NOT red.
  4. Take an old fish aquarium pump and place a plastic hose down, under the plastic skull. Turn it on. The air bubbles pass around the head and make it look like it is boiling or reacting with chemicals in the water.
  5. Take the baby jars and paint them black, orange, green, red. Place things in each container for your friends to either see or smell. Garlic powder (labeled Vampire Killer), tobascco sauce (labeled Slug Juice), green ketchup (labeled Alien Blood), grated parmesan cheese (labeled Mummy Dust), cold spaghetti (labeled Toads Guts), burnt matches (labeled Bats Hair), or pepper corns (labeled Witches Warts). use white labels for the jars and don’t make your writing neat. Shaky writing is best.
  6. The last thing you need to do is to add some light to your lab. Add light anywhere you think it will look eerie. Definitely add a white light behind the skull in the jar.

Halloween Crafts – Black Cat

What you will need:


  • 2 spring-type clothespins
  • black construction paper

What to do:


    1. Cut four leg shapes from construction paper long enough to cover a spring- type clothespin and glue to each side of the pin, with the feet at the open end.
    2. On construction paper, draw shapes for cat’s body, head and tail.
    3. Cut out the shapes and glue them together.
    4. Add cat features with markers or paint.
    5. Clip the clothespin legs to the cat’s body, positioning legs so the cat will stand.


Halloween Crafts – Fuzzy Spiders

What you will need:


  • 2 black pipe cleaners
  • 2 googly eyes
  • large button with 4 holes
  • black construction paper

What to do:


    1. Cut pipe cleaners in half.
    2. Push pipe cleaners halfway through each hole of the large button.
    3. Bend and shape the pipe cleaners to look like legs.
    4. Cut out the spider’s head and body section from black construction paper.
    5. Glue body to the top of the button.
    6. Glue eyes to the body.


Celebrate the American Thanksgiving

The Pilgrims sailed to the US aboard the Mayflower and set ground at Plymouth Rock on December 11, 1620. The first winter that the pilgrims spent in the US was devasting and they lost 46 out of 102 settlers. The following fall brought a bountiful harvest.


The remaining colonists decided to celebrate with a feast and included 91 Indians who had helped the Pilgrims survive their first year. It is believed that the Pilgrims would not have made it through the year without the help of the natives. The feast lasted three days.


This “thanksgiving” feast was not repeated the following year. But in 1623, during a severe drought, the pilgrims gathered in a prayer service, praying for rain. When a long, steady rain followed the very next day, Governor Bradford proclaimed another day of Thanksgiving, again inviting their Indian friends. It wasn’t until June of 1676 that another Day of Thanksgiving was proclaimed.


The first Thanksgiving Proclamation was made in 1675. In 1777 a day of national Thanksgiving was proposed by the Continental Congress. But it was a one-time affair.


Sarah Josepha Hale, a magazine editor, is responsible for getting Thanksgiving declared a national holiday. Hale wrote many editorials about the importance of giving thanks in her Boston Ladies’ Magazine, and later, in Godey’s Lady’s Book. Finally, after a 40-year campaign of writing editorials and letters to governors and presidents, Hale’s obsession became a reality when, in 1863, President Lincoln proclaimed the last Thursday in November as a national day of Thanksgiving.


Thanksgiving was proclaimed by every president after Lincoln. The date was changed a couple of times and in 1941, Thanksgiving was finally sanctioned by Congress as a legal holiday, as the fourth Thursday in November.


CORNUCOPIA, korn-yoo-KO-pee-uh One of the symbols of Thanksgiving is the cornucopia, also called horn of plenty. It is a decorative piece, originating in ancient Greece, that symbolizes abundance. The original cornucopia was a curved goat’s horn overflowing with fruit and grain. It symbolizes the horn possessed by Zeus’s nurse, the Greek nymph Amalthaea, which could be filled with whatever the owner wished. A great symbol to use to show a bountiful harvest.

Father’s Day

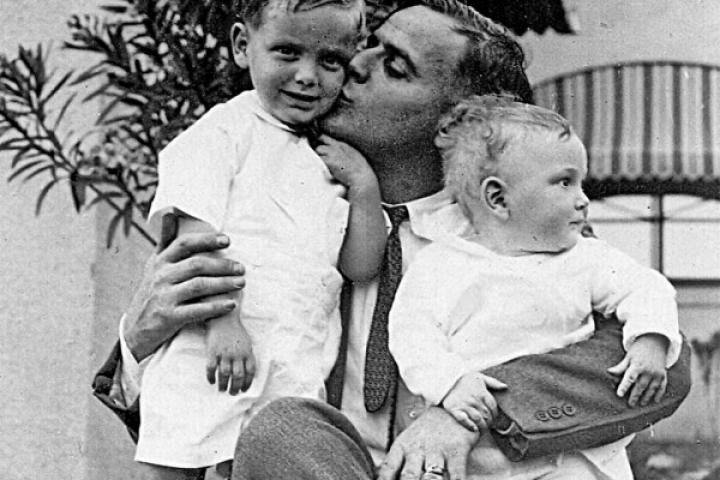
Celebrate Father’s Day and make him feel like the King of the World!


The celebration of Father’s Day can be credited to Mrs. John B. Dodd, of Washington State, who first suggested the idea of the holiday in 1909.


Mrs. Dodd’s father, civil war veteran William Smart, was widowed when his wife died during childbirth with their sixth child. Despite the obvious hardships, Mr. Smart proceeded to raise the newborn along with his five other children, by himself.


It wasn’t until his daughter Sonora Dodd became an adult that she realized the strength and selflessness her father had shown in raising his children as a single parent. The original date chosen for the holiday was June 5, Mr. Smart’s birthday, however the celebration was postponed until June 19, the third Sunday in June, because there was not enough time to prepare.


In 1924 President Calvin Coolidge supported the idea of a national Father’s Day, but it never became official until 1966 when President Lyndon Johnson signed the presidential proclamation that set aside the 3rd Sunday of June as Father’s Day.

Arts and Crafts: Leprechaun Hat

What You Need

1/2 gallon round ice cream container, clean and dry, without lid
4 pieces of Green felt
1 piece of Gray felt
1 piece of Black felt
1 yard of Green ribbon about 1/2″ wide
Scissors
Ruler
Black permanent marker
Glue
Hole punch
Large circular object (however wide the felt is)


How To Make It

  1. Using black marker, trace around the bottom of ice cream container on green felt.
  2. Cut out the circle and glue it to the bottom of the ice cream container.
  3. Cut a piece of green felt to go around the container (you may need two pieces of felt) and glue it around the container.
  4. Punch a hole right below the lip of the container. Repeat on the opposite side. This will be where you place the ties for your hat.
  5. Trace around a large circular object that is bigger than the opening of the ice cream container and cut out the circle. This will be the brim of the hat.
  6. Sit the ice cream container, open side down, on the middle of the felt circle. Trace around the container.
  7. Cut the circle out of the middle of the large felt circle. Discard this inner circle piece. Now you can see that this is the brim.
  8. Cut small lines 2″ into the brim (cut from the inside of the circle). This creates “tabs” that will allow you to push the “tabs” up inside the hat and glue in place.
  9. Turn the ice cream container/hat on the flat end. Lay the circle with the snips on top of the open end of the container. Run a bead of glue around the inside of the container near the rim. Push the tabs up into the container and against the glue.
  10. Once the glue has set up, punch a hole in the felt on the brim of the hat next to the hole on the ice cream container. Repeat for other side.
  11. Cut a strip about 2″ wide out of the black felt.
  12. Cut a 4″ square out of the gray felt.
  13. Cut a rectangle in the middle of the gray felt about 1 1/4″ x 2″. Discard the little piece of felt.
  14. Lay black band around the hat about an inch above the brim. Cut off any excess felt where it meets in the back. Glue in place.
  15. Lay the gray (buckle) over the black band where you want it to appear. Glue in place.
  16. Cut the piece of ribbon in half. Thread one piece of ribbon from the inside of the hat to the outside. Tie a double or triple knot on the inside of the hat with one end of the ribbon. Take the piece of ribbon on the outside and push down through the hole in the brim. Repeat with the other piece of ribbon.
  17. Place the hat on your head and tie the ribbon in a bow under your chin.

Note: You might also want to make a Shamrock out of green construction paper and have it sticking out of the band around the hat.


Dress all in green and don’t forget to place a hammer in your black belt! You can always make a hammer out of grey and brown foam.


If you have a small or medium sized pail, cover it with black felt or paper. Cut out disks/circles from cardboard and color them in gold. Fill the pail with gold and carry it around too.

Arts and Crafts: Leprechaun Trap

What You Need

  • Shoe box without lid
  • Aluminum foil
  • Glue
  • Green felt or paper
  • Shamrock stickers or cut out ones you created
  • Scissors
  • Stick about twice the depth of the box.

How To Make It

  1. Cover a shoe box with aluminium foil using glue to hold it in place.
  2. Cut shamrocks out of felt or paper to decorate your trap. You can also use stickers for this.
  3. Glue the shamrocks, if not using stickers, to the box.
  4. The night before St. Patrick’s Day, put a stick under the box so that the box is lifted up on one end. Leave it out by your front door.
  5. If a leprechaun stops by, he’ll leave a surprise for you! Perhaps some green candies or a few shiny pennies.
[elementor-template id="13988"]