 Reva
Reva
Worldly Greetings
Learn to communicate with your foreign friends in their language!
Greeting
Language
Translation
Dutch/Flemish
Finnish
French
German
Hungarian
Irish
Italian
Portuguese
Spanish
Swedish
Turkish
Hallo/Hoi
Hei
Salut/Bonjour
Hallo/Guten Tag
Szia
Dia dhuit
Ciao/Salve
Olá
Hola
Hej
Merhaba
Dutch/Flemish
Finnish
French
German
Hungarian
Irish
Italian
Portuguese
Spanish
Swedish
Turkish
Dank u
Kiitos
Merci
Danke
Köszönöm/Kösz
Go raibh maith agat
Grazie
Obrigado(m)/Obrigada(f)
Gracias
Tack
Tesekkürler
Dutch/Flemish
Finnish
French
German
Hungarian
Irish
Italian
Portuguese
Spanish
Swedish
Turkish
Hoe heet je?
Mikä sinun nimesi on?
Comment vous appelez?
Wie heißt du?
Hogy hívnak?
Cad is ainm duit?
Come ti chiami?
Como te chamas?
Cómo te llamas?
Vad heter du?
Adin ne?
Dutch/Flemish
Finnish
French
German
Hungarian
Irish
Italian
Portuguese
Spanish
Swedish
Turkish
Ik heet (your name)
Minun nimeni on (your name)
Je m’appelle (your name)
Ich heiße (your name)
(your name)nak hívnak
(your name) is ainm dom
Mi chiamo (your name)
Chamo-me (your name)
Me llamo (your name)
Jag heter (your name)
Adim (name)/Ismim (name)
Dutch/Flemish
Finnish
French
German
Hungarian
Irish
Italian
Portuguese
Spanish
Swedish
Turkish
Hoe oud ben je?
Kuinka vanha sinä olet?
Quel âge avez – vous?
Wie alt bist du?
Hány éves vagy?
Cén aois thú?
Quanti anni hai ?
Quantos anos tens?
Cuántos años tienes?
Hur gammal är du?
Kaç yasindasiniz?
Dutch/Flemish
Finnish
French
German
Hungarian
Irish
Italian
Portuguese
Spanish
Swedish
Turkish
Ik ben … jaar oud
Minä olen … vuotta vanha
J’ai … ans
Ich bin … Jahre alt
Én … éves vagyok
Táim … bliain d’aois
Ho … anni
Eu tenho … anos
Tengo … años
Jag är … år
… yasindayim
Robot Fun Facts
What is a robot?
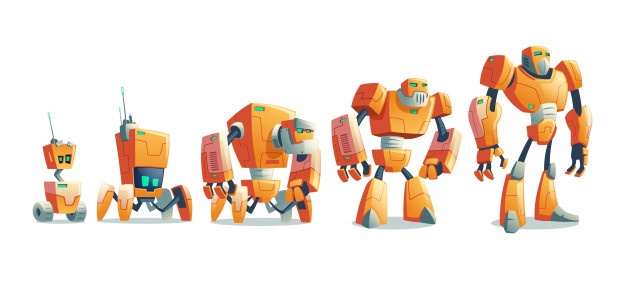
A robot is a machine that can complete a series of actions automatically. Robots can be any shape or size.
How do robots move?
Electronic circuits make is able to move. These can be controlled by radio signals from a distance, a local remote or a computer.
Where does the word “robot” come from?
The word “robot” was first used in a Czech play in 1920. It comes from the Czech word for work or labour.
Can robots feel?
Robots cannot feel emotions. However, they can be built to have senses. Television cameras have light sensitive cells that can “see” for the robot. Some robots have touch-sensitive pads that enable it to pick up a delicate object without breaking it.
What is an Android?
Simply, an android is a robot shaped like a human being.
Do we use robots for dangerous jobs?
Yes. When a task is too dangerous for a human to do, a robot may be sent in to carry out a series of complicated tasks. Robots are used to deactivate booby-trapped bombs, handle dangerous chemicals and take reads in dangerous areas of the Earth, such as volcano’s. Robots are sometimes destroyed during these tasks. As much as we do not want to loose the robot, a loss of human life would be far worse.
Are robots used in factories?
Yes. Humans control the robots and fix anything that goes wrong, but robots carry out tedious tasks. For example, in the production line of a car assembly, they may have a robot that will tighten the tire screws instead of having a human do the job.
Do they use robots in space?
Yes. Robots have been sent to Mars. These robots collect soil, rock and atmosphere samples, analyze them and then send the data back to Earth. Missions manned by robots are a lot cheaper than sending humans. You can also leave a human on a distant planet forever. You can’t do that to a human!
Will robots be able to think for themselves?
This is not known. In many ways, after being programed properly, they already think for themselves. They are able to assess a lot of information in a particular circumstance and make a decision based on what they “know”. Some robots even learn! If they make a mistake they learn not to repeat it.
What is animatronics?
Animatronics is a method of animating models by using specially developed robotic techniques. They use this for museum displays and cinema work. You can see it when you watch such things as humans being eaten or beaten up by dinosaurs, aliens or monsters.
What is Virtual Reality?
Virtual Reality is a series of effects produced by a computer that enables someone wearing special equipment to feel as if they are really within an artificially created world. Wearing electronically controlled gloves and other clothing make it possible for you to think you can feel objects in the virtual world. A helmet relays sounds and pictures to you. I’ve had this experience when I was overseas and I LOVED it! If you see this technology at a science fair, get in line to experience it!!
Halloween Crafts – Backpack Ghosts
What You Need:
- 10″ Square of White Fabric
- Plastic Clips
- 1″ White Pompoms
- White Cord
- Two 10mm Wiggle Eyes
- Tacky Glue
- Candy Corn
- Scissors
What To Do:
- Tie the center of a 12″ piece of white cord to a backpack clip.
- Cut a tiny hole just big enough to fit both ends of your cord in the middle of a 10″ square piece of white fabric. Feed both ends of the cord through the hole pushing fabric up to the clip.
- Put a dab of glue on your pompom.
- Put the pompom up inside the fabric, lining up the dab of glue with the cord knot.
- Run a bead of glue down each side of the pompom, pressing the cord along the glue.
- Tie the cord together at the bottom of the pompom.
- Let dry and trim.
- Cut another 12″ piece of cord. Tie it around the fabric, just under the pompom to make the ghost’s head.
- Glue on eyes and decorate with candy corn.
Halloween Crafts – Aliens
What you will need:
- clear glass or plastic jar with tight-fitting lid
- Sculpey bake-hard craft clay
- little plastic (or glass) eyes of various sorts
- acrylic paints
- food coloring
- paper for labels
- Cotton Balls
- glue
- your computer
What to do:
- Paint the lid of your jar black, so it will look like a real scientific specimen jar.
- Using the Sculpey, model your creature, making sure it will fit inside the jar.
- Poke the eyes into it, then take them out
- When your creature is finished, bake in a 325-degree oven until the thing turns uniform brown. Let it cool fully.
- Paint, and glue in the eyes.
- Decide what you have just created. Give it a name like, Twiggle Stimjiggy From Mars.
- Create the label for your jar. On your computer, create a scientific specimen label. Print the label.
- When the paint on your alien is dry, it’s time to fill the jar with water and insert your “specimen” into the “formaldehyde”.
- Tint the water with food coloring. I suggest green or orange for a great effect.
- Wind threads of cotton around your alien.
- Glue your label to the jar.
Halloween Crafts – Ghost Tree
What you will need:
- 1 white plastic trash bag per ghost
- 1 round balloon per ghost
- 1 rubber band per ghost
- black paint or permanent marker
- string or thin rope
What to do:
- blow up a balloon until it is as big as you would like the head of your ghost. (Don’t make it too bog because then it may pop.)
- Put the balloon in a plastic bag and situate it so that a corner of the bottom of the bag is at the top of the balloon.
- tie the bag just below the bottom of the balloon.
- Draw a face onto the balloon with your paint or marker. The bag should be tied tight enough so that the surface is shaped evenly with the balloon.
- Make a hole in the top of the bag (make sure you don’t get the balloon) just large enough to insert the rope or string. Tie the string tightly & hang from a tree branch.
Halloween Crafts – Coffin Guy
Your parents will have to help you with this project. Even though this project is easy once you get going, it requires the use of tools to complete (cutters and cutting plexiglass).
What You Need:
- Cardboard boxes (3 of equal length)
- Cutter or scissors
- Masking tape
- Spray paint (black and white)
- Styrofoam ball for head
- Cloths (dead guys)
- Newspaper
- Pillows
- Christmas snow
- Plastic spiders, worms, snakes, maggots, bugs
- Plexiglass (cut to fit top of coffin)
- Sandpaper
- Cotton batting
- Christmas lights (either white, green or red)
What To Do:
- Make a coffin from boxes. First cut one side off each of the boxes that will be used to make the ends of your coffin. With a pencil label them boxes 1 and 3. Cut 2 ends off the third box. With a pencil label it box 2. This will leave 2 sides to the box. Tape box number 2 to boxes 1 and 3, connecting all the sides together. Make sure you expand out the sides like a coffin is, in a triangular shape on the sides. Spray paint the entire coffin black. Then, VERY lightly, spray paint white on the coffin to make it look old.
- You can either spray pain the inside of the box with white paint, or lay pillows on the bottom to form a cushion for your corpse to lay on.
- Start with a Styrofoam head. Either draw a decaying face on the foam, or, use a scary mask or skeleton head.
- Stuff a shirt and pants with newspaper. Be sure to add the little details like a tie, belt and shoes. You can make your corpse a girl if you want too.
- Now put some Christmas snow on your corpse. This gives the effect of being cold.
- Add spiders, lizards, snakes, if you like for effect. Be creative. How about placing a snake slithering out of the skeletons eye socket. Or worms coming out the mouth and ears.
- String some Christmas lights around your corpse.
- Now take a sheet of plexiglass to cover the entire thing. This is a fantastic effect and shouldn’t be excluded. Cut it to fit properly over your coffin. If your glass cracks don’t worry about it. It will add to the effect. Sand the edges so they are smooth.
- To make the plexiglass look cold, spray it VERY lightly with white spray paint or use Christmas snow around the edges. Paint holds up better through the years. Place the plexiglass over the coffin making sure your electrical cord for the lights is hanging out and can reach an outlet. Put masking tape on either sides of the plexiglass and attach it to the coffin.
- Place some cotton batting around the edges of the coffin. This is optional. The spray paint or Christmas snow may be enough. It is your choice.
- Turn down or completely turn off the lights in the room. WOW!!!
- To make this effect is more spooky, how about adding some dry ice in a bucket behind the coffin. What a GREAT effect!
Halloween Crafts – Mad Man’s Laboratory
Your parents will have to help you with this project. Even though this project is easy once you get going, it requires the use of tools to complete (hammer and nails).
What You Need:
- Old car or electronic parts
- Clear tubes
- Old wires
- Old board
- Hammer and nails
- Clear plastic jars or containers
- Fake hand
- Paint
- Plastic skull, bugs, snakes, rats or whatever you like
- Water
- Red food coloring
- Old fish aquarium pump
- Old jars of baby food (or small containers)
- Garlic powder, tobascco sauce, green ketchup, grated Parmesan cheese, cold spaghetti, anything else smelly or gross looking.
- Colored Christmas lights (red and green are great)
What To Do:
- Take old car parts, wires, and tubes and nailed them in creative ways to a board. Leave a big enough space in the middle to place a fake hand.
- In the middle place a fake plastic hand. Stick some of the wires and tubes into the hand. You can even paint the inside of clear plastic tubes different colors (green is always good). Fake blood dripping down is a great effect!
- Take an old clear plastic container or jar. Place a fake plastic skull inside the container. Add bugs, snakes, rats, toads or anything else you can think of inside. Add water until the container is about three quarters full. Put in a drop or two of red food coloring. All you want here is a pink color NOT red.
- Take an old fish aquarium pump and place a plastic hose down, under the plastic skull. Turn it on. The air bubbles pass around the head and make it look like it is boiling or reacting with chemicals in the water.
- Take the baby jars and paint them black, orange, green, red. Place things in each container for your friends to either see or smell. Garlic powder (labeled Vampire Killer), tobascco sauce (labeled Slug Juice), green ketchup (labeled Alien Blood), grated parmesan cheese (labeled Mummy Dust), cold spaghetti (labeled Toads Guts), burnt matches (labeled Bats Hair), or pepper corns (labeled Witches Warts). use white labels for the jars and don’t make your writing neat. Shaky writing is best.
- The last thing you need to do is to add some light to your lab. Add light anywhere you think it will look eerie. Definitely add a white light behind the skull in the jar.
Halloween Crafts – Black Cat
What you will need:
- 2 spring-type clothespins
- black construction paper
What to do:
- Cut four leg shapes from construction paper long enough to cover a spring- type clothespin and glue to each side of the pin, with the feet at the open end.
- On construction paper, draw shapes for cat’s body, head and tail.
- Cut out the shapes and glue them together.
- Add cat features with markers or paint.
- Clip the clothespin legs to the cat’s body, positioning legs so the cat will stand.
